Friday, May 11, 2012

Dressing-Up a Princess

It was my niece 3rd birthday and we were some kind of excited for that big day. Since we have been doing a gown business, my mom wanted her granddaughter to wear the best gown that really suited her. The gown that  was brand new and will give her an oozing innocent and appeal. Angela is a toddler who is vibrant and bubbly. She is fast learner and meticulous too on clothes. So we decided to give her the best dress available in our shop. Mom, chose a red bridal satin gown with patches on the upper part and on the edges. But Angela's dad- Rasty disliked it. He wanted a pink gown. Pink for a girl and blue for a boy. What an obsolete concept! We had few arguments on the gown color, because me and mom would still insisted on the red gown. We thought it would be a perfect color for Angela since she has a porcelain skin. Cinderella and Snow White did not wear pink gown but they both fabulous and feminine. So, pink is no longer a symbol of femininity then. Its just a stereotyping in our culture that is why some still adapt this concept. But nowadays, as the world revolves and so the tastes of people too. We have variety of colors and we can always find one that is perfect for our skin color and stature.

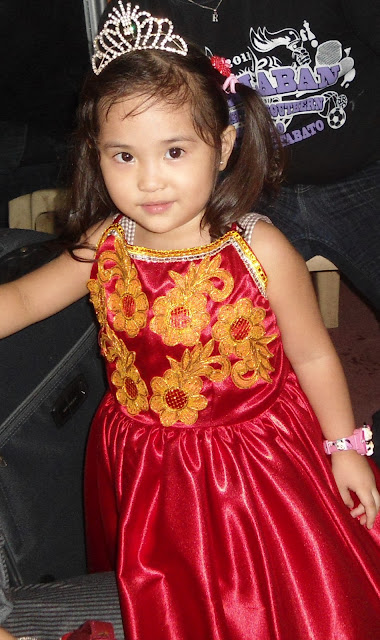
Since my brother can no longer argued with us, so then he was forced to agree with us. When my niece wore the gown, she really look great and pretty and had great time wearing her simple red gown. This red gown has a ruffled bottom and and upper cape with center flower. Check it out below.

iammarizza.blogspot.com
Pretty Smile in a Red Gown
Angela and the party goers in costume

Angela with Mom and Dad


Thursday, May 10, 2012

HONG KONG TRAVEL GUIDE FOR FIRST TIMER


Welcome to Disneyland

When you heard Hong Kong, what comes to your mind? Is it Ocean Park, Disneyland, Sumptuous Dimsum? Or what? I guess, all of the above. When my then boyfriend turned out my husband asked me what I would like to receive from him since it was Christmas, then I guess a Hong Kong vacation was not too bad to ask. Since I have been already to different theme parks here in the Philippines like Star City and Enchanted Kingdom so I was wondering how it is like to be in the world’s renowned DISNEYLAND RESORT? Is it twice the fun? Will I bring out more the childish or child-like attitude in me when I am already there? Well, I was so glad and blessed that he agreed to have a vacation instead since he wanted to go to Disneyland too.
So what are the things you need to do especially if you are a first timer on travelling abroad or first timer to Hong Kong. This country is in Asia-Pacific and this is one of the countries that Filipino can  go to without having a visa. I will share some things that you need to prepare and do so you will enjoy a hassle-free vacation. Check these things below:

1.   VALID PASSPORT. This is a primary document you need to have since you can not go to any country without this. The validity of your passport should be six (6) months prior your scheduled vacation.

2.      TRAVEL AGENCY. Since it will be your first time, a help from travel agency will do to iron out things and prepare the necessary hotel and flight bookings. Good thing about travel agency is that they will provide you the tourist guide when you are there. So your tour is scheduled and you can visit Hong Kong’s primary tourist spots within a time frame. It’s quite expensive but I guess it is worth it. You don’t need to cram or confuse on what place to visit, your guide will help you on that.

3.      WATCH OUT FOR PROMO. When you plan to book your vacation through promo ads, you need to ask the details of the promo being advertise since there is always a catch as part of the marketing strategy. Usually, travel agency advertisement about lowest package deal to Hong Kong for 3 days and 2 nights but sometimes it does not include plane fare and airline tax. So, if you already selected an agency to handle your vacation get-away better ask them other options. Or you can tell them your budget so they will be the one to look for promo within your budget. Just to give you an idea, just budget your money ranging from twenty-five thousand to thirty-five thousand (P25,000 to P35, 000) will do. This budget is good for two which includes hotel with breakfast, plane tickets, tour and other fees.


4.       AIRPORT. Go to the airport 3 hours prior to your flight because you need to pass different section prior to boarding.
Ø  CHECK-IN COUNTER – check in your luggage to your assigned counter. Counter has signage on top, so you can check that it’s your assigned counter by comparing to your ticket on flight details. Check your airline carrier for maximum allowance of baggage to hand carry and to check in. While falling in line to the counter, an officer will give a small immigration form. You need to fill it out and present it to the immigration officer later. This form has to copies. Give one copy to the immigration officer here in the Philippines. And the other copy to the officer in Hong Kong

Ø  PAY YOUR TRAVEL TAX- This is another counter few step from check in counter. If you can not find it you can ask any airport officer or the person in the counter as to where to the counter for paying travel tax. You can actually pay your travel tax first before checking in your luggage or vice versa.

Ø  TERMINAL FEE- after checking in and paying the travel tax you need to pass in this section. Hong Kong terminal fee is around five hundred pesos (P500). So include this in your list of expenses. Travel tax and terminal fee are fees you need to personally pay in the airport and not through your travel agency.

Ø   IMMIGRATION – After paying the terminal fee you need to go to your boarding area but before reaching it you need to pass in this section. All of the passengers who will have international flight will flock here. So expect that there are many of you in queue.  The officer will go through your documents for validity. You need to bring out your plane ticket, passport, immigration form, hotel accommodation receipt or transmittal provided by the travel agency for verification. You can smile at the Immigration officer but do not expect them to smile back at you. I guess that’s there protocol. They are avoiding close contact with the passengers so as to avoid bias judgment.

Ø  BOARDING AREA - This is the waiting area. A lounge that you can use to wait for you plane. Just refer to your ticket as to what GATE you need to go and wait for there are many gates for different flights. The waiting are is usually surrounded with stalls selling food and drinks. I would suggest you buy bubble gum, lots of it. Since you will be travelling for 3 hours, so you need to chew something to avoid hissing sound stays in your ears.

Ø  ON THE PLANE –As a rule, turn off your cellular phone please. Put your hand carry on the overhead carrier and then just relax and reserve your energy for your tour.

5.    ARRIVING AT HONG KONG INTERNATIONAL AIRPORT – Finally, you are in Hong Kong. Upon arrival to the airport you need to secure your documents and hand carry luggage, you might forget them due to over excitement. When you are finally off the plane you need to follow the crowd or your fellow passengers. Hong Kong International Airport is twice as big as the one we have here in Philippines you might get lost if you will not able to keep on track to your destination. Before getting you check in luggage, you need to pass again to the immigration.  There are lots of immigration counter, DO NOT choose the one for HONG KONG RESIDENTS because you are a tourist and not a resident. Prepare your passport and relevant documents for checking.  After passing the counter, there is an ARROW or SIGNAGE that will lead you to the conveyor where you can find your luggage. Please, please, please read the signage if you get lost or better ask any officer you see to help you out. They can understand ENGLISH, but you need to slow down when speaking so they can understand you fully. Go out to the WAITING AREA of the airport where you can find your tourist guide waiting for you.

6.     INSIDE THE HOTEL- Your guide will bring you to your hotel to unload your things. And reminder, Hong Kong electric outlet is not the same as ours. They are using 3-hole rounded adapter to the socket of every appliances. You therefore, you can not recharge your cellular phone, camera or any gadget to their outlet. What you will do is go to the FRONT DESK tell them you will buy the ADAPTER for your devices and they will give one and charge you more or less 20 to 25 Hong Kong Dollars. Take it or leave it.

Well, so far just follow those simply things above and you will never go wrong when you will be in Hong Kong. Enjoy Hong Kong’s scenic views and learn how to speak BASIC CANTONESE. This will be relevant when you are shopping and want to ask for discounts.  Enjoy your grandiose vacation!

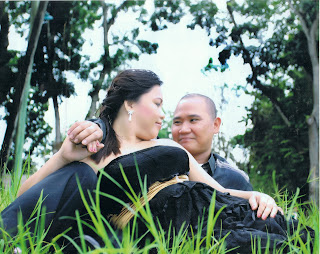
TIPS FOR YOUR PRE-NUPTIAL SHOOT


Picture Perfect Shoot in the Beach
Every woman who dreams of a wonderful wedding should consider many factors to plan a perfect wedding in her lifetime. A tips on pre-nuptial video or pictures is one of the highlights of one's memoirs of her wedding. With this, couples will able to have great time posing in front of camera showing their inhibitions perhaps or simply depicting great time with each others' arms. It is essential that one should plan on what to do or what to wear on the actual day of the shoot. You can hire professionals too to help you up in deciding what you want to do or what you want to project in the video or photo.

Here are some tips that you can consider when you decide to have a prenuptial video.

In-town pictorial. If both partners are busy before the shoot, you do not need to go elsewhere to find a perfect location. With this world of hybrid computers, your photographer can turn out an ordinary scene into a fantastic one. You can choose the park, your school, town market, harvesting farm or your local church. Since your birth town play vital role in you or your partner’s life, I think any scene from your town will greatly contributes your development as a person and its worth including that scene in your wedding album.

Photo Taken at the School Field
Out of town Pictorial. You can consider going to the beach and drawing your name in the sand or running along the seashore. These depict a romantic scene. You can go hiking too if you still have the energy to go to the forest or mountain. This scene brings a naturalist appeal and vibrant to your pictures.

Pack 2-3 Clothes. Changing clothes is important so as to avoid redundancy or monotony of the scene. As you change your poise, smile and posture, you need to change your clothes too for creative photo shooting. Better yet, wear a bridal dress other than your final wedding dress or simply a white decent dress. If you are wearing white then you are insinuating about your upcoming wedding day and not your college JS Prom.

Bring the things you gave to each other. If your man gave you teddy some years ago then bring it. You can bring all the things he gave you if you want. The logic is simply you are showing to each other how you value each other’s generosity and you want that to be included in your photo album.

Bring accessories. Well, this one for the sake of fantastic photo shoot other than a wonderful background. I suggest you bring balloons, 2 pieces of umbrella, a laptop, shades, sneakers, books and others. Anything cute and colorful I guess. Out of these things you can create a wonderful pose.


Well, apart from the material things you need to prepare for a candid shoot, a stress- free face and wonderful smile will compliment all the things you put in to have that unique, personalize and romantic picture-perfect photo. So, do not forget those factors too. Don't get stress, chill out and flash you winning smiles! Happy Wedding!
  
www.iammarizza.blogspot.com
Prenuptial Shoot at the School Park with Japanese inspired umbrellas


Wednesday, May 9, 2012

HOW TO MAKE CARTOON CHARACTER STANDEE FOR PARTY

Well guys, all of us love party, right? And so do the kids. Now, you will enjoy a colorful and meaningful party when we are going to put some kind of flair that adds up to the beauty of the party. Kids love to fantasize because of what they see on TV. They thought life is a wonderland full of laughs, toys and play.  One thing for sure kids will be forever kids. Meaning, all they think is eat, play and sleep. So as adults we love to see kids laugh and happy after fulfilling their childish whims. Been to party business for quite sometime and I would suggest a simple tips on how to make cartoon character standee that will make the party attractive and will get our kids thumbs-up. These tips are great to use when we mark our kids on their first birthday or the kid’s debut which is at her/his sixth birthday (this is when kid starts the school-age).

SUGGESTED CHARACTERS: POOH, DORA, BARNEY, CINDERELLA, PARTY CLOWN         
TARPAULIN PRINT. Choose any character that your kids love. In order to save on labor cost, you can download or copy the characters from the internet to a Microsoft Publisher or Corelle draw program in your computer or if you don’t have any computer just go to any internet café. The cost of  lay-outing for tarpaulin is around P150 ($3.5) while doing it in your own or in the internet café and saving it in your usb will only cost you P20 ($.47). Actually, you don’t really need a lay-out artist to do it since all we need is the colored character to be printed in tarpaulin, no colorful background at all. You can have it printed in 2x4 or 4x4 sizes. If you want a giant size of the character then I would suggest 5x6 or 6x6 sizes.

2.    CUT IT OUT. After having it printed. Then just cut it out. Follow the end line of the drawing so you will able to cut a life-size or real-size character. Dispose properly the excess or you can use it as a table mantle if the excess suits a table.

3.   PASTE IT IN PLYWOOD. Use a plywood bigger than your cut-out. You need to paste the cut-out in plywood so it will have a solid support when you are going to display it. You can use a RUGBY, GLUE OR PASTE to do it.  Then again, with the use of a hammer driving the chisel, you need to cut the plywood in the edge. Follow the edge of the cut out tarpaulin so the plywood will match the character.

      MAKE A LINK. At the back of the cut-out, nail or glue 2 or 3 feet long wood. Nail or glue the wood in the center body of the character going down. The nailed or glued wood should be 1 inch below the feet of the character. There should be an allowance to link the base.

5.       MAKE A BASE. In order for the standee to stand alone. You need to put a solid base on it. You can use a 1 inch or 2 inches thick wood. Cut it square in 1x1 or 2x2 feet enough to make the character stand.

     NAIL THE BASE & THE LINK. To have the finish product then just nail the base to the link of the standee to have that perfect character for the kid’s party.

There you have it! A standee for your kid's party! Standee can be a replacement for mascot. You can display it anywhere specially on the garden's entrance or in front of your house or venue. It will serve as a "come-on! Let's party" gesture to your guests and visitors. Happy Party!


PARTY FRIENDS!